Monday, February 18, 2013

cold floor Rx

Because we are putting in a marble floor, we were concerned that the floor will be cold on our bare feet.  Half the year, this will be a good thing, but the other half of the year, it will make it uncomfortable.  We don't want to put a heater under the marble, because this room does get a lot of sun since it faces south, and it warms up quickly.  The real concern is nights and first thing in the morning. 

Taking out the linoleum and underlayment, we can see sun through the slats of the subfloor.  We have a lot of ventilation under the house, which is necessary in this climate.  But - that means there are cool breezes blowing under the house when it's cold out - so we knew we wanted to insulate the floor.  Besides the open crawl space breezes, this house doesn't have central heat, and this space is the furthest from the floor heater.
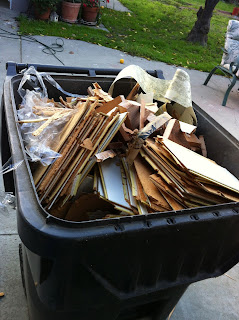
Dale spent most of the afternoon today under the house.  Of course, there's always a bit of bad news when you go into previously uncharted areas, and he found that the old cast iron drainpipe had a small leak under the sink, very minor, and that pipe will be removed when we relocate the plumbing, but it's annoying.  We went through and repaired the termite damage, replacing the subfloor planks that had damage:
This area will be underneath a banquette along the south wall, so it won't have a lot of traffic across it, but it's ready to go.

We went with a recycled denim insulation - for a couple of reasons.  First, I like the fact that it's recycled and environmentally friendly.  no VOC gasses, and no fiberglass particles, which is particularly great considering Dale has to lie on his back and push it up and tack it in place with wire braces.  Nothing like getting a face full of itchy scratchy fiberglass.  Also, it's extremely easy to tear apart with your hands (yet, it's firm and not at all fragile),so cutting is not a problem.

I don't think it's just my imagination, but the room feels so much warmer even tonight!  Before he puts the backerboard underlayment, Dale is going to get the electrical, gas and plumbing relocated while he can easily access the space.  We're pretty happy with this, and we'll be insulating under some of the other areas in the house that are cold (in particular, our bedroom!).

Sunday, February 17, 2013

and now, the floor

Finally, the wall is down and we could remove the temporary support.  The opening is so huge!  We hadn't had a chance to see it all clear without either plastic or the temporary support in place, so when we finally removed everything, we were a little surprised at how large the opening was!
Don't you love the precariously hanging fluorescent fixture?  That's gotta go soon enough.

Today, we got started on removing the floor.  We cut through the linoleum and the plywood, and then pulled it up in sections, so we exposed the subfloor.
Lots of nails to pry up and we had a chance to inspect the subfloor planks.  There  are a couple of planks we will need to replace, there is some termite damage.  In southern CA, it's extremely common to have termites, since there's nothing to kill them.  So it's not a matter of IF you have termite damage, but how much.  We have a very small amount in the kitchen, just in one corner, and it has all been treated, so it's not active.  We just need to replace the damaged wood.

 So here's the room now.  We laid down a sheet of plywood on the damaged section so the cats will leave it alone.  Next, we are going to cut the subfloor right across the center of the room, so we can move the gas and plumbing lines.  After we took this picture, we marked out where the island will be, so we know where to have the kitchen plumbing for the sink and dishwasher come up, since they'll be in the island.  The gas line will be moved to where the dishwasher currently is.  Then we'll close the floor up again, leaving the stubs up, and then we can lay the underlayment for tile.

I worked out a plan for the tile -- it will have a pattern something along these lines:


It'll have a 21" border that has a variety of black, white, and mosaic border sections.  This will run all along the walls, with a black/white checkerboard on the diagonal inside.


  I'm anxious to get that started!


Monday, February 11, 2013

sneak peek

As with every project, as soon as we think, "we're almost done, just another couple of hours...." we run into all kinds of snags and unexpected complications.  Just when we were getting the beam all ready to go up, one little thing after another kept cropping up (split joists, bowed boards, electrical confusion), and what we kind of thought would be an afternoon job consumed the whole weekend.
Dale spent entirely too long with his head and shoulders in the attic space, with some odd splicing to figure out.  We had to cut a larger opening to sort this out, but it will be handy so we can access the wiring when we put can lights in the kitchen.
While Dale was working on electrical and constructing the laminated beam, I took down most of the kitchen ceiling tiles and the furring strips.  I still have a row or so to go, because this is where our work zones overlapped.

The ceiling itself is actually in a lot better shape than we'd anticipated.  There are small cracks, but no separation between the plaster and the lath, which is what we were afraid we'd see.  These small cracks are typical of plaster ceilings, and we can patch these up just fine.  There are a few small places where the plaster is soft, over the window and another small spot in the middle.  I also removed 3 layers of wallpaper on the window wall. 
We've managed to pile up quite a large amount of construction trash.  We got rid of all the bathroom construction trash over time, rather than renting a dumpster, and we'll get rid of this the same way.
So taking the wall down gave us a pile of 2 x 4s with a ton of nails in them.....
that we added to the boxes that are filled with the plaster and tile.  The trashcans are full of ceiling tiles and wallpaper scraps....
and we finally got the beam installed and the remainder of the old wall taken down.  The house is dusty, the floors are filthy and there's pretty much a film on everything.  But.... I don't have final photos because we still have the temporary support wall in place.  Dale got called to go into work this evening, so that last little step is still there before we can get a real feel for how it is going to look with the wall gone!
almost there!

Monday, February 04, 2013

s.l.o.w. p.r.o.g.r.e.s.s

I don't know if I can even call it progress, that's how slow it's going.  Dale had to work overtime all week and weekend (he worked over 75 hours this past week!) so when he came home each night, he sort of just took a shower then dropped into a chair for a couple of hours before going to bed.  And I've had the semester start off with all kinds of issues, so since we tore the wall down, nothing has gone on there.  Well, I did take down the plastic after cleaning up the rest of the plaster removal.


The cats are loving the open wall.  They see the horizontal braces as the ideal perch to survey the house.  I keep trying to knock them off so they won't get into more trouble, but they are persistent.


Because when Dale is home I can't even bang things around since he needs his sleep, I ran out to check out a tile shop in Orange County.  I am wanting to do a black and white checkered floor in the kitchen, but I don't want it to look all country, I'd like it to be a little more elegant.  I love this picture of a tile floor:


I love the black and white checkerboard on the diagonal, and the bands of borders around the side.  But I want it to be in a richer finish, so I went out to check out some marble.    I picked up some 12 x 12 tiles of carrara and nero marble for the field, and a couple of marble mosaic borders.  I laid them out and love the way they look.  So now I have to map out the floor and plan the design.  I am hoping to hit another shop this week to look at kitchen cabinets -- we are likely going with IKEA cabinets, but I'd like to see what other options we might explore before we commit.

Blogging tips